Wednesday, April 21, 2010

Re-Potting Basil in Containers


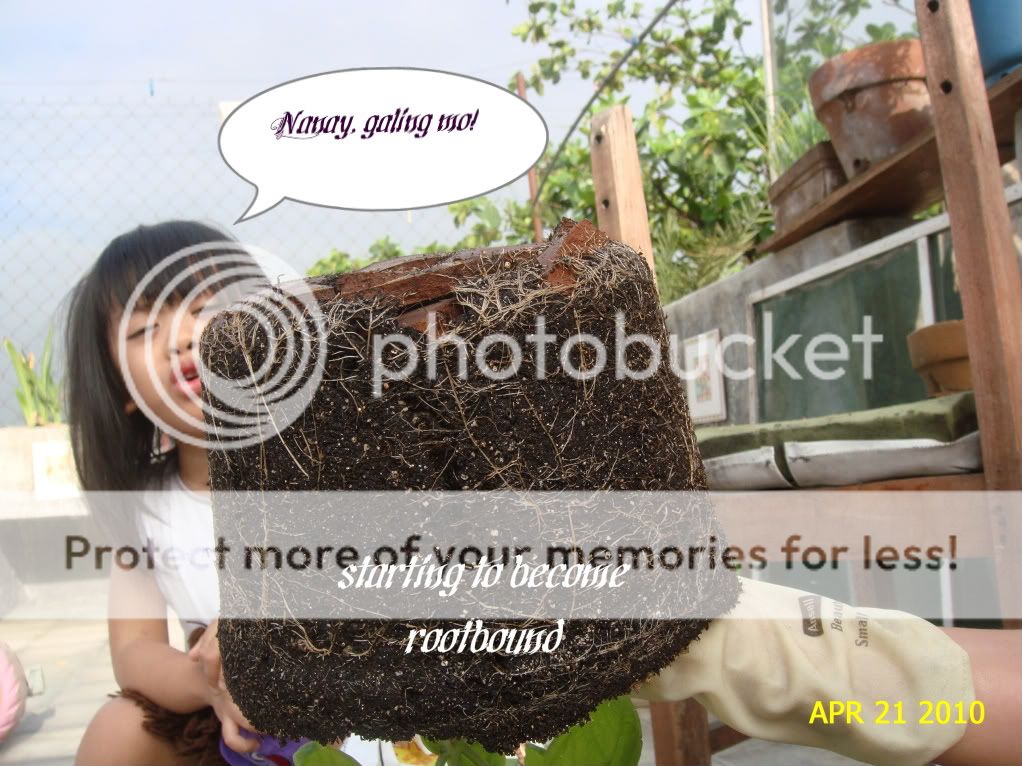
My Daughter looking over as I work


Remember the second basil transplant that I had, the one that I over-dosed with fish emulsion? I’m seeing some new growth of leaves, but stunted growth.  I was wondering what could be the problem as I have given my basil proper fertilizer and observed proper watering practices.  I took it out of its container and here is what I found:


The poor plant is starting to become root-bound.  The roots are starting to go through the container holes, passing the broken terracotta pots that I placed at the bottom.  When I removed the terracotta pieces, the roots started to fan out.  Since I do not have the proper feed to promote root growth, I decided not to cut down the roots.  I already cut them once; I dare not do it again in the absence of any root medication.  It is very much ideal to cut down the ends of the roots and promote root growth with fertilizer that is weak in nitrogen but moderately high in phosphorus and potassium. 

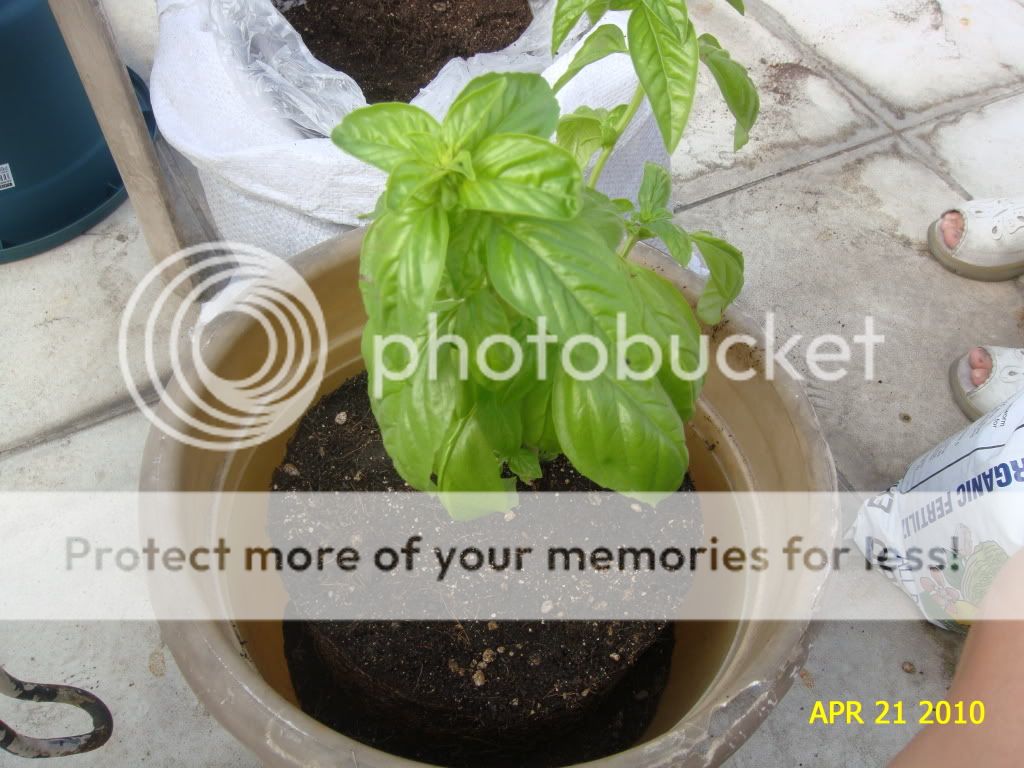
I picked a container that is about 8 inches in size, the smallest optimal size for growing basil in containers.  I lined the bottom again with broken terracotta pots and placed 3 inches of potting soil at the bottom.  It would have been ideal to place 2 inches of soil and an inch of compost at the bottom, giving the soil a light, but firm push as you go (tamping).  Place the plant on the soil and check to see if the top level of the soil of your plant is 2 inches below the lip of the pot.  I had to make it 3 inches below to make room for the earthworm castings that I bought in my local garden store.  Gradually fill the container with soil around at the side, firming it down to make sure that your soil will not recede every time you water your plants.

The instructions for my worm castings were to place an inch on the top of the soil, carefully mixing the top soil with the castings in order not to damage the shallow tap roots of my basil.  I watered the pot until water flows through the drainage holes.  A gardening staff told me that you must water plants immediately after transplanting for the roots has been disturbed. 
It is important to inspect the roots of your basil every once in a while.  Basil can have aggressive root growth, and you will need to repot every once in a while to prevent it from getting rootbound.  


Tuesday, April 20, 2010

Getting Into The Parsley Challenge - Part 2


I found a little earthworm in one of the orchid pots.  Ever since I was a kid, I have always heard of earthworms being beneficial to garden plants.  Being the novice container gardener, I had the hair-brained idea of placing the earthworm in my parsley… And the result???


A wilting, sick-looking parsley that should have been healthy and full of foliage.   It is, indeed, very annoying.  I found out that worms used in container gardening will actually eat away any organic material in the pot.  My potting soil is entirely made up of organic material, and sadly, the roots of my parsley are also organic… The worms will eventually render the soil of the container into the consistency of clay.  As a result, the soil will retain too much water, drowning the roots.  The clumped soil and accumulated water will prevent the roots from getting oxygen, and also cause anaerobic breakdown.  As a result, your plant will eventually wilt down because it is unable to absorb water and nutrients.

I actually planned on buying a new set of seedlings and grow it in the same container.  It can be done as long as the container is washed well with soap, bleach, and water.  This is to remove any eggs that are stuck on the sides of the container.  The potting mix should be disposed as well.  These actions must be done to prevent future proliferation of worms in the container.  I will not risk it, for I do not want another episode of this one.
Lesson learned: do vermicomposting in a separate container, and not in your container garden.  


Growing Basil from Cuttings Part 1 Section 2 - Progress & Problems


April 20, 2010: After 6 days, roots can now be seen emerging from the stems of the basil cuttings.  Roots this short cannot be planted yet as they are not yet fully formed to help support the cuttings for proper growth.  I think they are about 1/2-3/4 of an inch long.  I should rejoice with the formation of roots on my basil, but I have encountered a couple of problems while the roots are forming.

My first problem?  Birds.  They are everywhere, these little creatures.  Originally I started with 3 basil cuttings, and now I ended up with 2.  I do not know which of the numerous birds that flock our veranda took the cutting; the aroma must be really enticing for them to nip the cuttings off the glass.  I had to protect the basil cuttings from birds by placing a net around it.

Second problem is the formation of powdery mildew on the leaves of the basil cuttings.  I could not find a small container that has a small lip, so the leaves are always wet.  Make sure that you have one before you start creating basil cuttings.  I do not know yet how to stop the progression of the mildew without using any harmful chemicals that poison the birds.  Hopefully, I’ll be able to find an organic solution soon enough before I place them in pots.

Sunday, April 18, 2010

Proper Way of Harvesting Basil

After a month, my basil is now fully established. I wanted to cook linguine in creamy mushroom and basil sauce, so instead of buying fresh basil (or using the one in the green bottle), I decided to harvest my basil. Now, harvesting is not as simple as picking off a leaf here and there. There is a technique in harvesting basil, which is pretty much very important if you love your herb. Improper harvesting will result to a weaker plant which will not reproduce the same way as it did on your “first” harvest.

I harvested the plant the same way I prepared cuttings for propagation.  The stems are cut with a sharp knife for I will also use the stems to promote rooting.  You can also pinch off the stems with your fingers or with the use of sharp kitchen scissors if you do not plan on propagating your herb.

Harvesting basil must be done by cutting the stem three nodes down, starting from the very tip of the branch.  The node is where the leaf and the branch meet.   The picture will give you a good idea where the node is going to be, and where to cut.  I removed the big leaves and left the small leaves at the very top.

Unlike basil bought in supermarkets, I only needed a small amount of leaves to flavor my dish.  Good things come to those who wait before harvesting basil.

Note: this tip for harvesting basil can also be employed when pinching off branches to encourage bushier growth, and never harvest more than a third of the plant.

Now if you have a lot of basil plants, and even just three of them, you will be surprised at the amount of basil you can harvest from your established herbs. If you want a look on how much basil you can get, see the recipe video below from Chef Pasquale as he shows how he harvested basil from his very own garden to make his pesto sauce.


Friday, April 16, 2010

Growing Basil from Cuttings Part 2


One of my basil cuttings sprouted roots.  I measured the roots and found that they were already 2 inches in length.  I decided to plant them in a small container to see how this will grow.  I still have other batches of cuttings waiting to grow roots, and will plant them once roots have formed.  When you decide to grow basil from cuttings, others suggest dipping the ends of the stem in pure honey.  Honey is believed to have anti-microbial properties that will help prevent pathogenic microorganisms from harming the plants as they develop roots.  This is only done when you decide to directly place the cuttings in the soil.  I, on the other hand, prefer to let them grow roots in water to help give them a head start.


Pot Specifications
It is suggested that you use small pots of 3 inches in size for growing basil cuttings.  A large pot will only promote root rot, as others have experienced.  Since my place is very hot, with temperatures reaching 37 degrees Celsius in midday, I used a pot that is 5 inches in size – and I also do not have any pot smaller than that.  I prefer to use plastic as terracotta pots can take in a lot of heat, and also leach out water from the soil.  The bottom already has pre-made holes for drainage.  To prevent soil from eroding, I placed several small pieces of broken terracotta pots at the bottom. 


Planting the Cutting
I placed a potting mix of perlite, vermiculite, organic matter and compost in the pot.  Fill the pot until it reaches 2 inches below the lip of the container.  I dug a hole at the center that will accommodate the cutting up to slightly above the roots.  It would be better if you can fill the pot about 3/4 of the way and create a mound at the center.  This will help you spread the roots slightly.  Whichever method you choose, always make sure to treat the roots carefully to prevent damage.  Carefully cover the plant until you cover the roots completely.  I covered the cutting almost up to the level of the lowest set of leaves for anchorage. Afterwards, water the cutting until you see water drain from the pot.  This is highly essential as the cutting has grown used to a high-moisture environment.  Others report seeing the cutting wilt for a couple of days or so before becoming established.  To help the cutting, I placed it in a shaded area, north side of our house.  It will have to stay there for 24 hours, with sun exposure of 1-2 hours the next day.  This will have to continue for 3-5 days to harden off the plant. 

It is advised that you put fertilizer that promotes root growth.  I gave it a dose of fish and seaweed emulsion decoction that is slightly weaker than what the instructions in the bottle said.  Let us see how this basil cutting will grow, and hopefully, it will grow well.  


Thursday, April 15, 2010

Growing Basil from Cuttings Part 1


April 13, 2010 Here is my pride and joy nearing its fist month.  The foliage has grown and the height has increased.  The grayish cover on the soil is made up of earthworm castings.  I also sprayed my basil with fish emulsion last April 11 around night time.  The sun and temperature during this summer season is positively scorching.  The temperature reaches up to 38 degrees Celsius during noon time and around 32 degrees Celsius during the afternoon.  The basil at the bottom is a victim of too much fish emulsion sprayed at 4pm in the afternoon.  That basil is the second transplant that was removed from the pot.


April 14, 2010 I had to pinch back my basil as it is starting to become leggy.  The picture at the bottom show the trimmings that I got from the plant.  The trimmings were removed with the use of a really sharp knife as pinching or using scissors can damage the delicate tissues of the stem.  


Since I do not plan on cooking the leaves, I decided to grow basil from cuttings.  The lower leaves were removed, as the level of leaves mark the limit of root growth.  Aside from that, the more leaves your cuttings will have, the faster it will dry up when it is planted in soil.  It is ideal that you should have at least 3-4 inches of stem that will be submerged in water.  The more stem area that you have, the more roots your basil will develop.  Some websites will tell you that it will take about 3-4 weeks for basil cuttings to develop roots.  I, on the other hand, have seen otherwise.  See that really small, weak looking cut of basil at the right of the cup?  Click on the picture and magnify.  If you look closely at the picture, you will see formed roots starting to become dense.  It took about a week for roots to appear, and I am guessing that by next week it will have established roots.  Let us see how this will go.